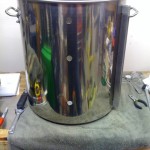
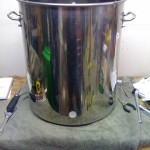
Took an hour or so tonight and finished cutting all the holes in the HLT. I had to drill a liquid return hole near the top of the kettle and cut the big 1.25″ heating element hole at the bottom. I put the liquid return at 2 inches from the bottom of the rolled to top of the kettle cause that looked like a good place to put it. The heater element hole went 3″ from the bottom of the kettle on the right side. I originally wanted to put the heating elements in the backs of the kettles for aesthetic reasons but decided at the last minute that I would have more room to work inside the kettle for adding accessories if I went in from the side.
For the large heating element hole I used a “chassis punch”, which is a new tool to me. It’s basically a heavy metal punch and die that the punch slips in to with a bolt through the whole thing. You drill a pilot hole, put the bolt through, put the punch on one side and the die on the other and tighten the bolt till you have a perfect hole. It worked well, but I am not sure it was any easier than the step drill I’ve been using for the 7/16″ holes. I also think the threads on the bolt stripped a little. My understanding is that Greenlee makes the best chassis punches, but they are kinda expensive. I picked up a knockoff from Radio Daze.
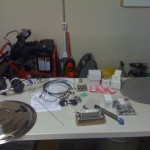
I also finally took some pictures. Here is the kettle with the 2 HERMS coil holes, the liquid return hole and the heater element hole and a picture of what I refer to as “The Loot Table”. This is all the stuff I’ve currently collected for the brewery. It’s going to overflow in the next week as the last of the orders all come in. I can’t wait!
So now all the modifications for the HLT are finally done and with any luck tomorrow I will be able to put it all together and start doing wet testing. Gotta make sure there are no leaks before I give it the juice!